Installing Valley Flashing On Existing Roof

Tying A New Roof Into An Old One Fine Homebuilding Question Answer Building A House Roof Home Additions

Pin On Metal Roofing

Roof Installation How To Shingle A Valley Hd By Roofrepair101 Roof Installation Roofing Shingling

Pin On Roof
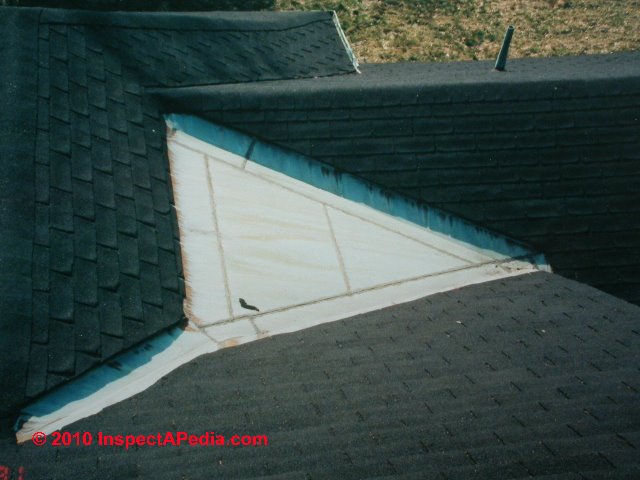
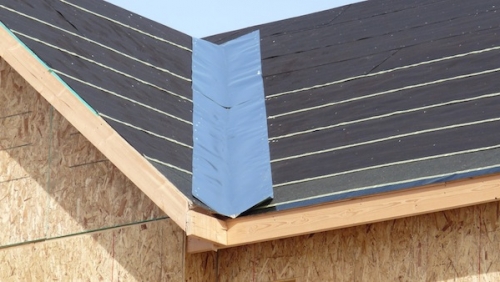
Roof Valley Flashing Specifications And Details

How To Build A Porch Screen Porch Construction Building A Porch House With Porch Screened In Porch

Install flashing on existing roof to extend the lifespan of your roof.
Installing valley flashing on existing roof.

Subsequently Building A Supplementary House Or Retrofitting An Existing One Choosing The Right Type Of Roof Can Be Mo Diy Metal Roof Roof Installation Roofing
How To Install Roof Flashing On Different Structure Places

Pin On Roofs And Gutters

Open Valley Roof Flashing Youtube
Source : pinterest.com
